Part 168: Descender & Helter-Skelter
Descender & Helter-SkelterThe meat of this system is a bunch of medium or slightly smaller-sized planets. Here are two of them.
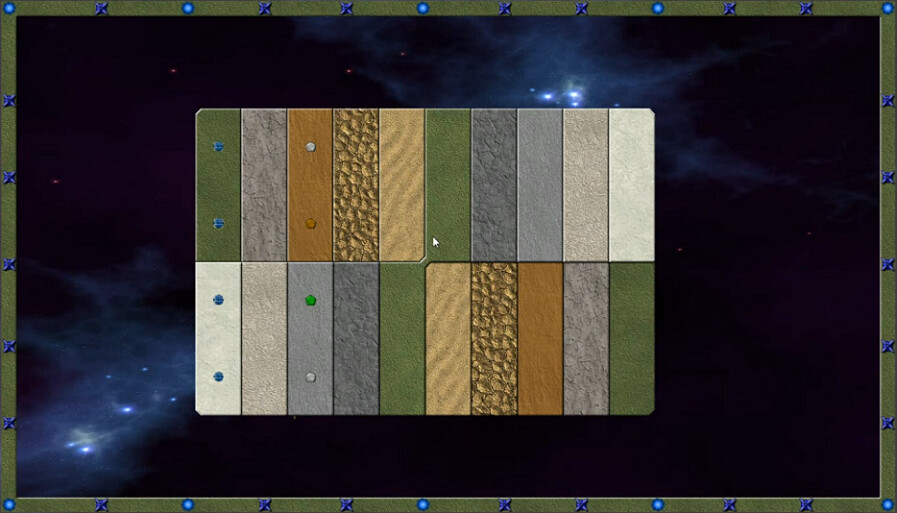
A few aspects to note on this map. The top 'row' of steps descends from right to left, the bottom row from left to right, and they sort of meet in the middle. The siphon locations towards the left are worthy of more attention than I gave them. They are far from necessary, but can make things easier. Of course all the creeper will come from that side. Then there is the ring of Towers, both spore and AE varieties, along the outside. Guppies are mandatory, and there are a few 'holes' in excluded areas to grant access. A single spore each, but still that's a fair number of them. The Emitters themselves are just standard-issue.

I begin on the safest ground, northeast steps which are distant from harm and elevated. A couple of early Reactors and then I need Pulse Cannons to ensure we are safe from the approaching Creeper.
The usual 3+ minutes are granted before the spores begin to arrive. It's a real light show - and energy drain - when they do, but I've got a good start on a reactor farm. This is a bit of overkill beam-wise; I could get by on a few fewer.

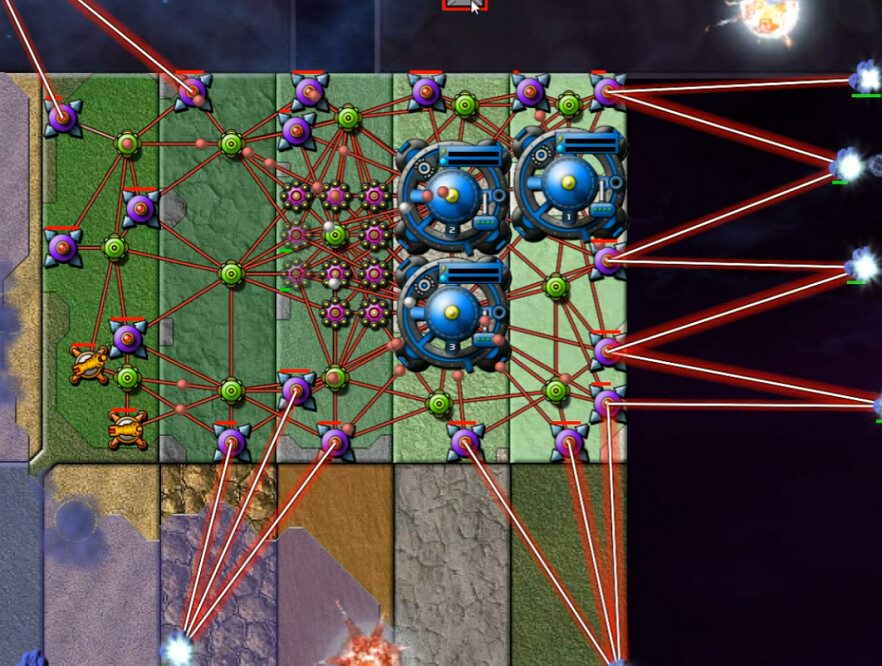
Timing out the building in between waves of aerial attacks takes a bit, but I get a few Guppies up and start to clear out the perimeter. This nullifier here will knock out the two spore towers on either side.
Here we can see there are multiple places to land. Of course, now that we've gotten a couple of them down I'll use those locations for SuperNullifiers and extend the range, working around the ring. Meanwhile a few Mortars and a couple more cannons ensure safety, and I'm using most of the available land to increase the energy supply.

For a bit I tried to expand a little on both fronts, but inevitably either the guppy operation or the primary network drew my attention and held it. When I decided to attack, I found a bit of Shield Leapfrog to be useful in making my way up to the most elevated emitter position. Wrap-up was pretty routine - no upgrades available on this map, but there's a lot more energy available once a bunch of the spore towers are taken down.

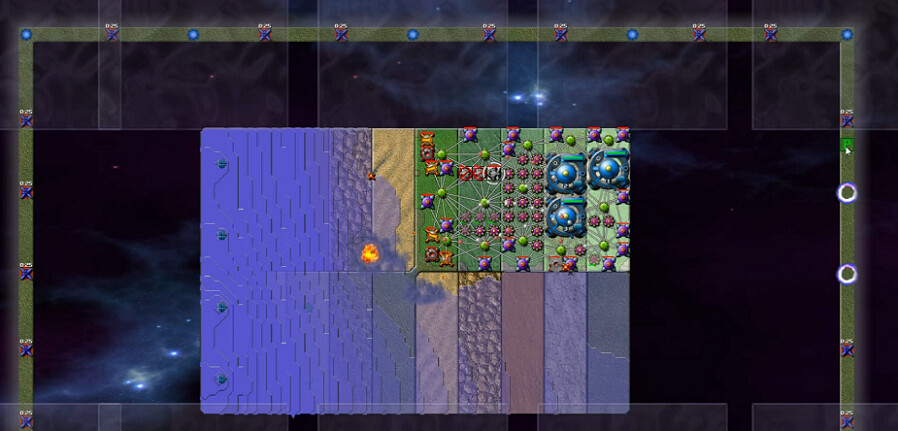
Pretty strange map with a large exterior flat area, totally cut off from a bowl-like center where all the action is. I don't like the way I played this level. It kept feeling like I was figuring things out too late to do anything about it and taking way too long to get things done. Not that I'm ever overly concerned about my time, but I definitely walked away from it thinking there were missed opportunities. So this is a good one perhaps for me to invite the thread to fill in the blanks.

I tried to get a nullifier up on one of the corner spore towers, but the creeper burst way too quickly. The obvious target here is the tech artifact, which is required for getting a Forge. It would take a while to actually acquire though.
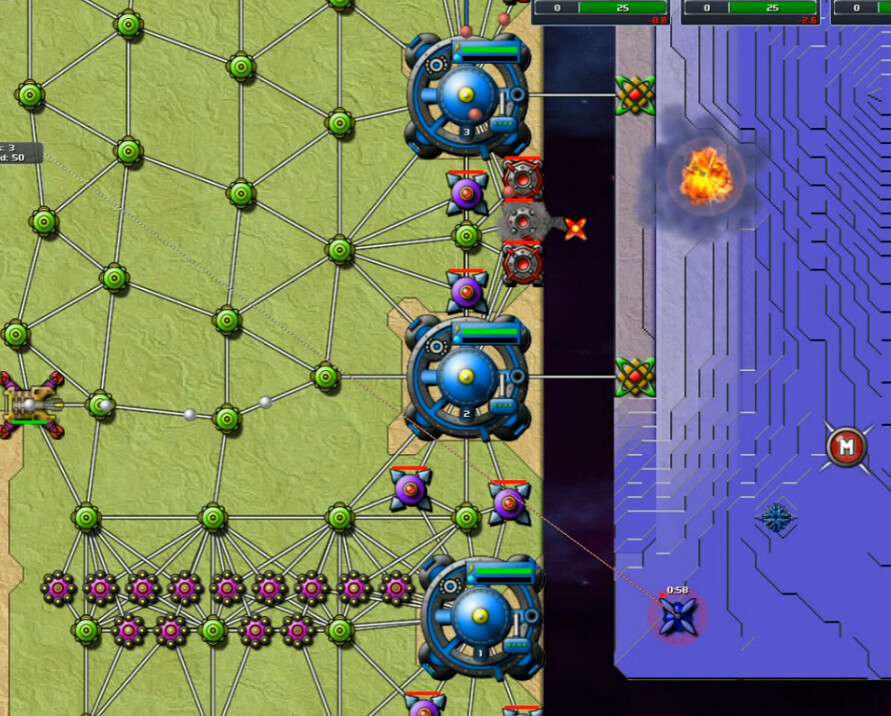
After getting up beams for protection, ramping up to bombard the Creeper Bowl with Mortars and Berthas was on the agenda.

It took several berthas to get the middle under control enough not to overflow the lip area.

Took almost 20 minutes to get to this point, but once a few Pulse Cannons were established on the rim of the bowl I was able to quickly reinforce them and work on snagging the artifact. Now we were in business.

A gradual escalation was conducted, as it seemed almost necessary to seize the high ground before pressing down into the much stronger emitters in the interior. By the time I got to the artifacts and siphon locations here, they seemed entirely superfluous.
In any case, a couple of less challenging levels here as mentioned. After the first few in this system, it was almost weird not to have to do a bunch of restarting.